Tuesday, January 29, 2008
Stripes or Solids?
Hi,
A beginner level player just broke and made a stripe ball. He turned around and asked for your advise.
What would you tell him? Would you choose tripes or solids? What would be a good offensive or defensive plan?
Let's hear it!
By the way, this is 8-ball on a 9 ft pool table.
(The post above is an example of how you will be able to illustrate a pool shot in a blog. To learn how to make your own, please keep on reading. It should take you 10 minutes to go through the whole process.)
Monday, January 28, 2008
It's easy to start your own blog!
Welcome shotmakers,
This blog has been set up to give you an idea what a "CueTable" blog can look like. As described on our site before, it is really simple to start a great looking blog of your own. You will not have to spend much time or any money. To help you get started, we have made a few "CueTable-ready" templates for you to use. A template is a framework which provides the basic layout foundation for all pages in a blog, such as where the header section, content section, and navigation sidebar will appear. The Cue Table templates are designed for blogger.com, which will also allow you to add many cool extensions without even touching the code. Furthermore, people will find your blog easier to use at blogger.com, and also you can update the blog any time, on any computer around the world.


Please look through them and find the style you like the most. In the next post we'll walk you through the process of installing the CueTable templates. You can then insert components or change the appearance of each section later. Switching a template on your blog will take less than 3 minutes and it will not effect your main blog contents, so you can switch again later when you find another cooler template.
Our goals at CueTable are to encourage clear communication among a newer generation of players, to promote ideas of sharing within the billiard community, and to display heathy messages of pool to the general public. Let's work together and share all the great ideas and fun with everyone!
Once you have your blog set up, please send us your link via blog_support@cuetable.com, we will add it to our blog link section on our website and blogs.

This blog has been set up to give you an idea what a "CueTable" blog can look like. As described on our site before, it is really simple to start a great looking blog of your own. You will not have to spend much time or any money. To help you get started, we have made a few "CueTable-ready" templates for you to use. A template is a framework which provides the basic layout foundation for all pages in a blog, such as where the header section, content section, and navigation sidebar will appear. The Cue Table templates are designed for blogger.com, which will also allow you to add many cool extensions without even touching the code. Furthermore, people will find your blog easier to use at blogger.com, and also you can update the blog any time, on any computer around the world.
Please look through them and find the style you like the most. In the next post we'll walk you through the process of installing the CueTable templates. You can then insert components or change the appearance of each section later. Switching a template on your blog will take less than 3 minutes and it will not effect your main blog contents, so you can switch again later when you find another cooler template.
Our goals at CueTable are to encourage clear communication among a newer generation of players, to promote ideas of sharing within the billiard community, and to display heathy messages of pool to the general public. Let's work together and share all the great ideas and fun with everyone!
Once you have your blog set up, please send us your link via blog_support@cuetable.com, we will add it to our blog link section on our website and blogs.
Sunday, January 27, 2008
Use a CueTable-ready template
Here are some basic, step-by-step intructions on setting up a new template so your blog can host CueTable diagrams nicely. We will be using the page you are looking at right now as an example. If you run into a problem or have any questions while doing this, please feel free to send us an email via blog_support@cuetable.com or post a question at the Software Workshop section of CueTable Library.
*Note: you will need a Gmail Account before you start. If you don't have one yet, please take a minute to register one for free.
Step 1 - Register
Open a new window and go to the Blogger New Account Page. Fill in your information and press "continue".

Step 2 - Give your blog a name and a permanent web address
Think of a title for your blog and put it in both fields. Press "continue" when done.

Step 3 - Choose a template
Don't worry about this for now. Just click on "Continue" and move on. You will be working on the blog template later.

Step 4 - Finish basic set-up
Click on "Start Posting" to move on

Step 5 - Create a test post
Type "Test" in the title, type "This is a test" in the editor field, click on "Publish Post", and click on "View Blog" to check it out.


Congratulation, You have just set up a blog!... Let's continue.
Step 6 - Download a CueTable ready template
Right-click or control-click on the icon below to save CueTableSample5BlogTemplate.xml onto your desktop. This is a template which contains layout and style information for the blog you are viewing right now.

Step 7 - Upload the template to replace the current one
1, Go back to the blog page you just created. Click on "Customize" on the top right corner of your blog page, click on the "Template" tab on the top, click on "Edit HTML" sub-tab.


2, Click on "Choose File" under "Backup / Restore Template", select the previously downloaded template from your desktop, and press "Upload"


3, Check the end of the "Edit Template" field, look for a comment that says "-- Modified for CueTable use --". If you can see it, then you are all set with template modification.


----
Thanks for walking through this tutorial. You should have a blog which will host CueTable layouts correctly. If you are into tweaking your blog some more, please continue to the post: Personalize Your Blog! to find out some recommended blog settings.
*Note: you will need a Gmail Account before you start. If you don't have one yet, please take a minute to register one for free.
Step 1 - Register
Open a new window and go to the Blogger New Account Page. Fill in your information and press "continue".

Step 2 - Give your blog a name and a permanent web address
Think of a title for your blog and put it in both fields. Press "continue" when done.

Step 3 - Choose a template
Don't worry about this for now. Just click on "Continue" and move on. You will be working on the blog template later.

Step 4 - Finish basic set-up
Click on "Start Posting" to move on

Step 5 - Create a test post
Type "Test" in the title, type "This is a test" in the editor field, click on "Publish Post", and click on "View Blog" to check it out.


Congratulation, You have just set up a blog!... Let's continue.
Step 6 - Download a CueTable ready template
Right-click or control-click on the icon below to save CueTableSample5BlogTemplate.xml onto your desktop. This is a template which contains layout and style information for the blog you are viewing right now.
Step 7 - Upload the template to replace the current one
1, Go back to the blog page you just created. Click on "Customize" on the top right corner of your blog page, click on the "Template" tab on the top, click on "Edit HTML" sub-tab.


2, Click on "Choose File" under "Backup / Restore Template", select the previously downloaded template from your desktop, and press "Upload"


3, Check the end of the "Edit Template" field, look for a comment that says "-- Modified for CueTable use --". If you can see it, then you are all set with template modification.


----
Thanks for walking through this tutorial. You should have a blog which will host CueTable layouts correctly. If you are into tweaking your blog some more, please continue to the post: Personalize Your Blog! to find out some recommended blog settings.
Saturday, January 26, 2008
Insert a Layout to Your Post
Here are the simple steps in adding a CueTable to your blog post:
Step 1
Click on "New Post" in the top right corner to bring up the post editor. Click on "Edit Html" tab once. --- IT IS VERY IMPORTANT TO BE IN EDIT HTML MODE INSTEAD OF COMPOSE MODE!

Fill in some information. Enter "The best way to play this?" in the title.
Step 2
Open CueTable program in a separate window, set up a layout and click on "Copy Html" button in the lower right corner.

Step 3
Go back to your blog post page, press Ctrl-V to paste the html embed code into the "Edit Html" window.
You can add some text afterwards: "Hi, this is a test on posting a shot... "

Step 4
Publish it and view the post.

----
Note
1, The layout embed html looks like this:
<iframe src="http://CueTable.com/P/?@3HGys3IMGd4PFdI@" noresize="noresize" marginheight="0" marginwidth="0" frameborder="no" height="430" width="660"></iframe>
2, Just in case your post content area is not wide enough, you can lower the width and height value. Just be sure to keep them around 3:2 ratio. We highly recommend you follow through our guide below to get a new template, so you can embed a table layout nicely.
3, The layout embed html works in WordPress blogs as well.
Personalize your blog!
After you have got a great style by importing a new template, there are a few settings you can change to give your blog a more personalized look and feel.
Blog Settings
To get to the Settings control panel:
1, Click on "Customize" on the top right hand corner of your blog
2, Click on "Settings" tab.
3, Go through each section and make changes accordingly. You can leave them as is. However, there are some Formatting settings we recommend as described in the next section.
Formatting settings we highly recommend

1, Show 3 Posts on the main page
2, Show Title field : Yes
3, Show Link fields : Yes
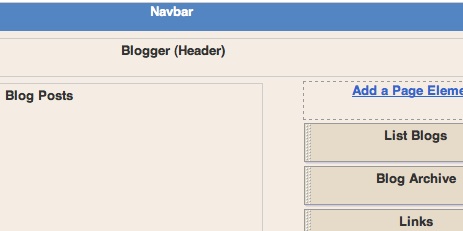
Additional Layout Elements
There are many different things you can add to the side bar such as slide shows, links, a video bar, or Google ads. These might help you provide additional related information for your viewers. You can see some examples in the sidebar of this blog. Each add-on is called a "widget" which can be set up easily within minutes.
To learn how to add these features please check: : Google Help > Blogger Help > Customize Your Blog > Layouts > Layout Guide

Adding Your Personalized Header Background Image
How about adding a picture of you, your team, your local pool hall in the header background graphic?
You can download the header background image of this blog by right-clicking on the icon below. Please feel free to change it any way you like and make it speaks for you!

There is one thing though, remember to keep its dimension (Height x Width) the same to ensure your modified image will line up properly in your blog. Also, you might want to keep the area of your blog title simple so people can read the title easily.
Once ready, follow these steps to upload your header background image:
1, Click on "Customize" on the top right hand corner. You should now be in Template > Page Elements.

2, Find the edit button on the lower right hand corner of the Header layout element. You might have to use the horizontal scroll bar to find it. Click on it. You will see a small new "Configure Header" window that pops up. You will be able to upload your header image here.
-----
Blog Settings
To get to the Settings control panel:
1, Click on "Customize" on the top right hand corner of your blog
2, Click on "Settings" tab.
3, Go through each section and make changes accordingly. You can leave them as is. However, there are some Formatting settings we recommend as described in the next section.
Formatting settings we highly recommend

1, Show 3 Posts on the main page
2, Show Title field : Yes
3, Show Link fields : Yes
Additional Layout Elements
There are many different things you can add to the side bar such as slide shows, links, a video bar, or Google ads. These might help you provide additional related information for your viewers. You can see some examples in the sidebar of this blog. Each add-on is called a "widget" which can be set up easily within minutes.
To learn how to add these features please check: : Google Help > Blogger Help > Customize Your Blog > Layouts > Layout Guide
Adding Your Personalized Header Background Image
How about adding a picture of you, your team, your local pool hall in the header background graphic?
You can download the header background image of this blog by right-clicking on the icon below. Please feel free to change it any way you like and make it speaks for you!
There is one thing though, remember to keep its dimension (Height x Width) the same to ensure your modified image will line up properly in your blog. Also, you might want to keep the area of your blog title simple so people can read the title easily.
Once ready, follow these steps to upload your header background image:
1, Click on "Customize" on the top right hand corner. You should now be in Template > Page Elements.

2, Find the edit button on the lower right hand corner of the Header layout element. You might have to use the horizontal scroll bar to find it. Click on it. You will see a small new "Configure Header" window that pops up. You will be able to upload your header image here.
-----
Tuesday, May 29, 2007
Subscribe to:
Posts (Atom)